
CONCEPT
The three main concept for this origami work is “a work that shows off 3D”, “a feeling of being like that”, and “openwork folding” (I don’t know this word is correct, but I think this is a kind of make sense. If you know more accurate word, please comment and let me know. In Japanese, this going to be “透かし折り”)
Recently, I’ve bought 3D printer and made a few things like a gear, chess pieces etc… And to make them, I use CAD and Blender, which are very interesting tool, because you can manipulate 3D model in “2D” display. Through the experience, I believe that I’ve improved my ability to play with 3D object in my mind.
Then, I want to apply it to origami, so I look for something good for representing 3D. In the beginning, I think a lamp is going to be great, because I’m very interested in an interior and the shape of lamp is simple but very popular and will have a lot of fun to design with origami. But, after I sketch some lamps, I am also hooked by a light bulb in them. And I remember I tried to make a light bulb with origami, but it didn’t work well. The only good thing about it was openwork; I represented a filament by it and it wasn’t so bad. I think the solution is more focusing on “3D”.
DESIGN

The idea of showing the filament through a light is something I’ve been thinking for a while.
In 2013 or 14, I came up with the idea and gave it shape, but at that time it was a two-dimensional work and the result was not very good. In the past, I tried to express detail, but it was too subtle, so this time I was conscious of the “light bulb-like” feeling.
In the memo stage, I tried to start the filament from the upper corner, but as soon as I started folding, I realized it was impossible.
It seems more stable to simply use the bottom half for the filament and the top half for the glass part. How to express the metal part depends on the leftover area, so I decide to make a prototype first of all.
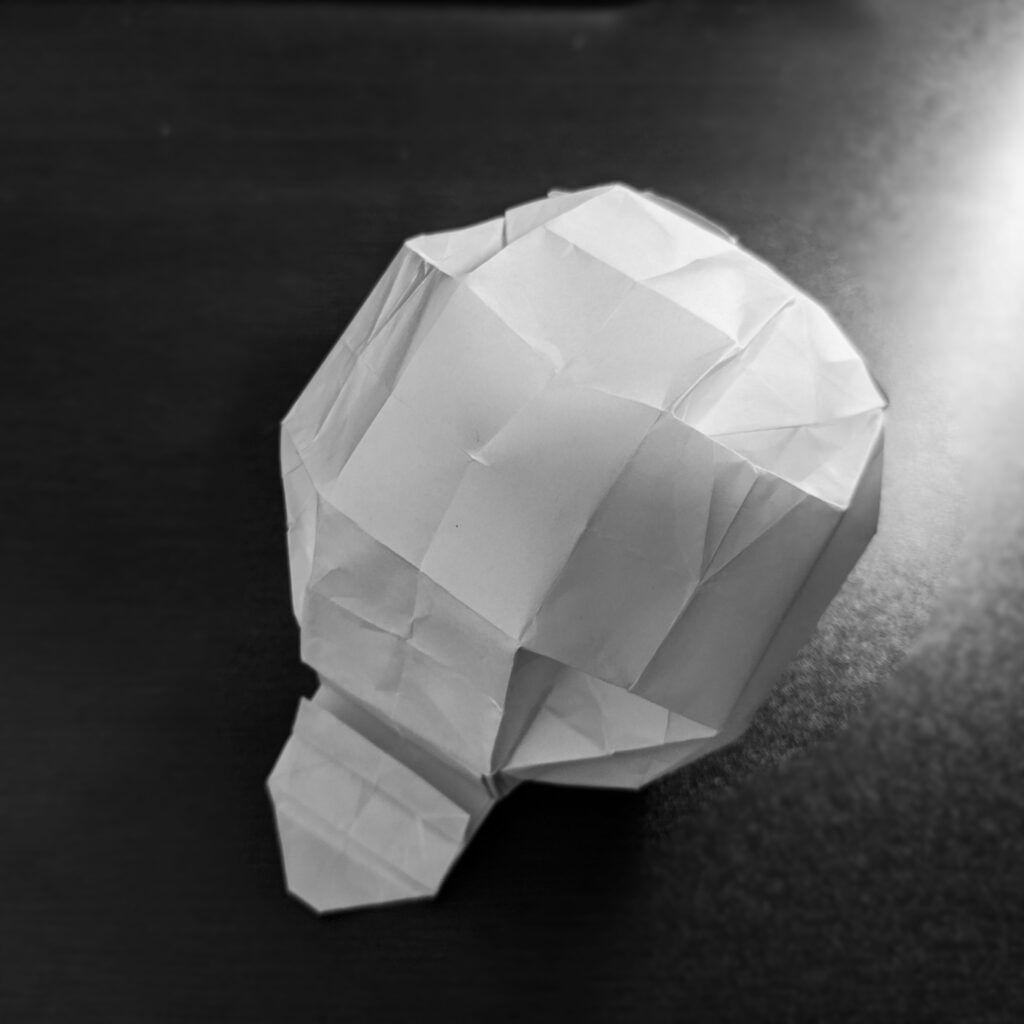
 1st Prototype -front
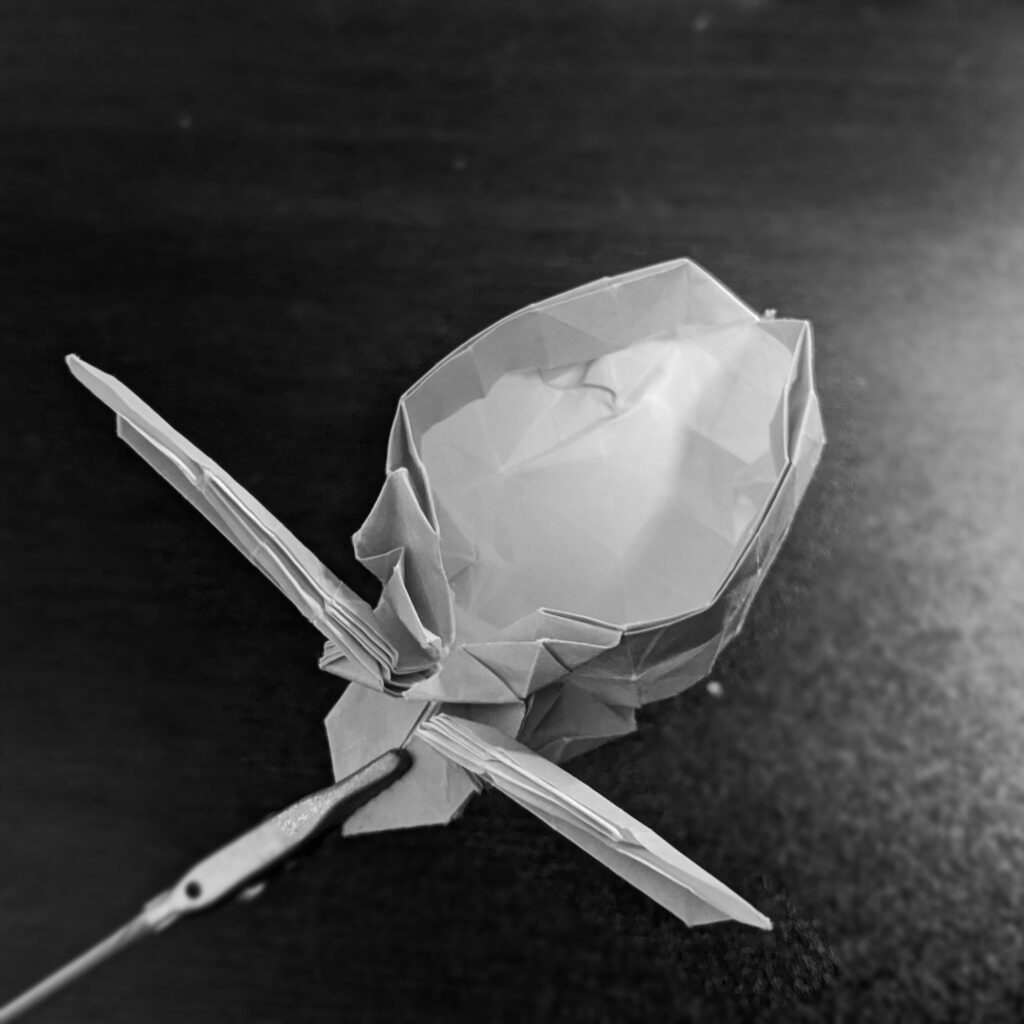 1st Prototype -back
I try to make the outline look like a three-dimensional ellipse, but I can’t. I decide to make it more deformed to give it more of a “light bulb” look.
In the process of making it three-dimensional, the fastening folds became quite useful and fun.
I’m thinking of making the metal fittings three-dimensional if possible, but it is difficult because of the size of the area (if I give too much space to the metal fittings, there will be too much paper on the glass part), and because of the deformed direction, I think it will be better to leave the metal fittings flat.
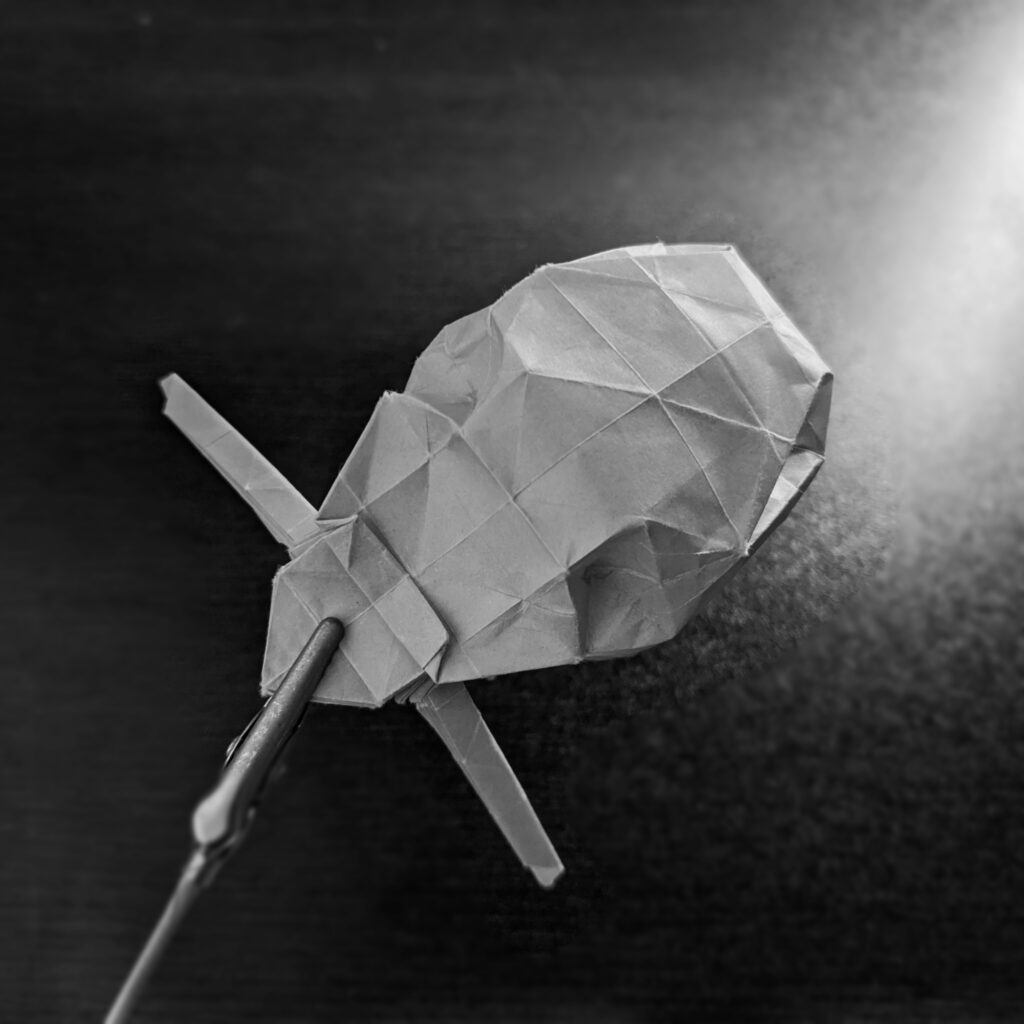
 2nd Prototype -front
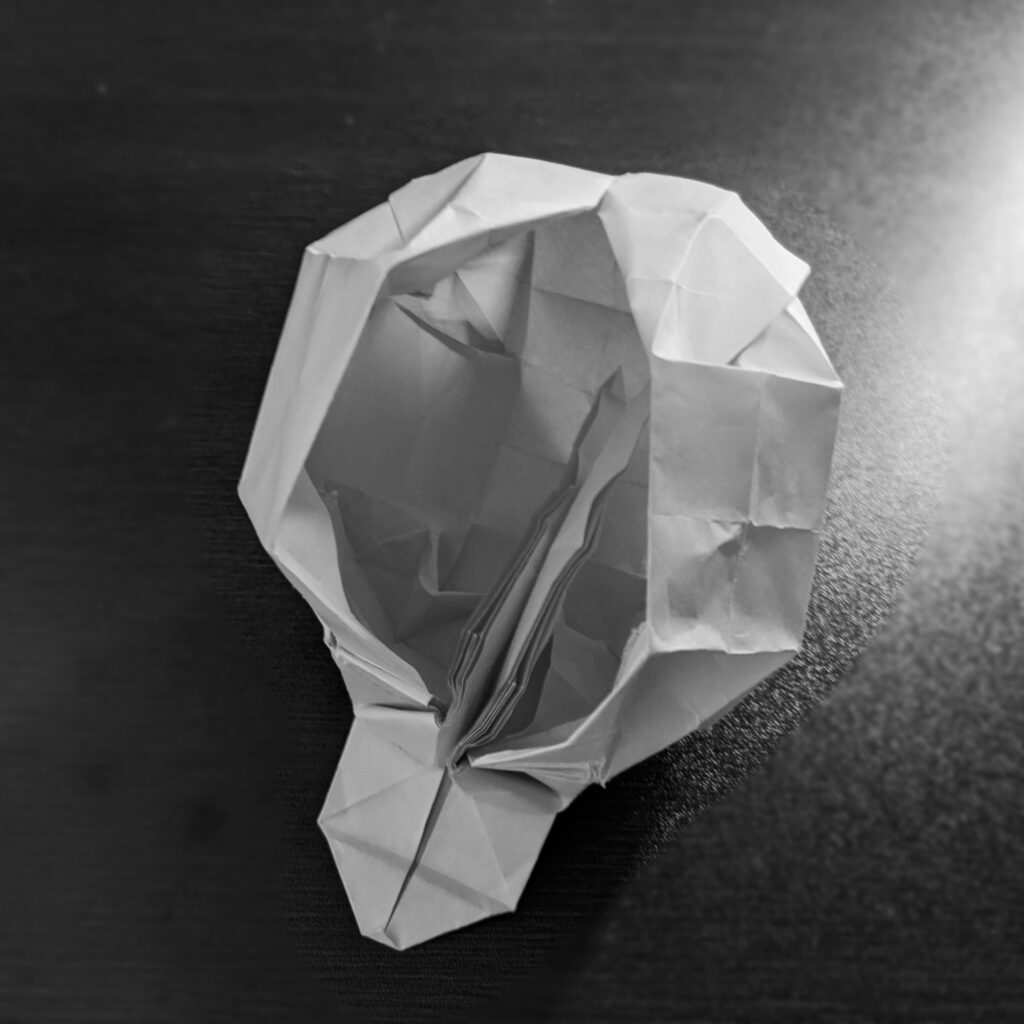 2nd Prototype -back
The second prototype on a slightly larger piece of paper. I start with 12 grids to see if I can make the metal fittings three-dimensional, but it is still not success, so I settled on 8 grids.
The direction is almost fixed in the first trial, so I can fold it without much trouble. For the openwork, I adjust the width conversion part and the three-dimensional part so that the paper will not overlap in the front.
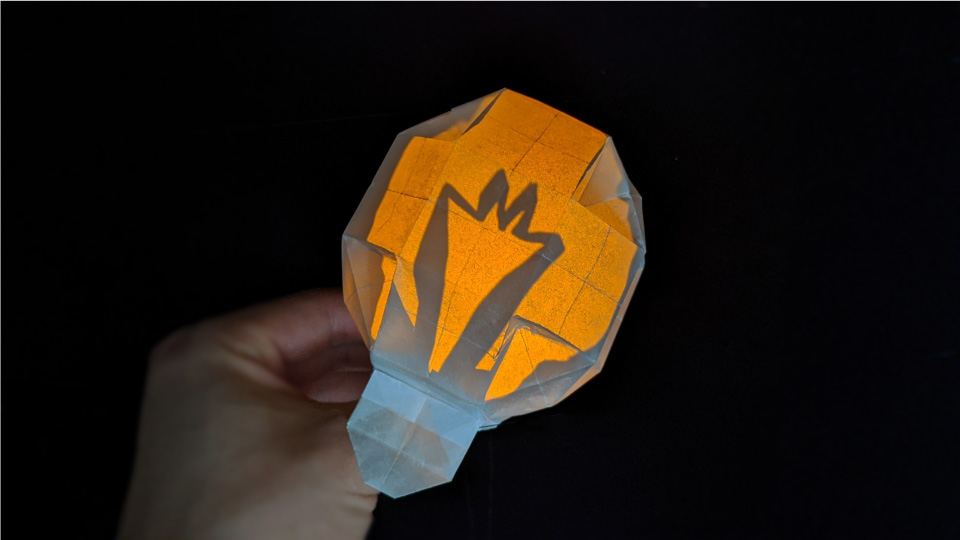
In order to show the filament part, I have to decide whether to show the back side of the paper or close it completely. If I close the back, the openwork won’t work well, so I decide not to close it. However, if I close the back, it looks like I’m just making something up, so I decide to show a glimpse.
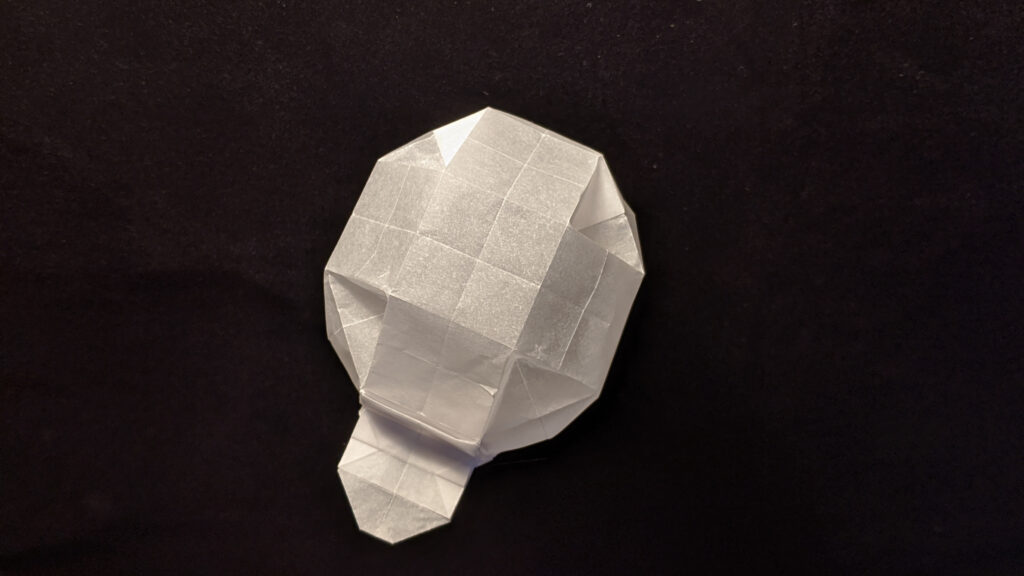
FINISHED SHAPE
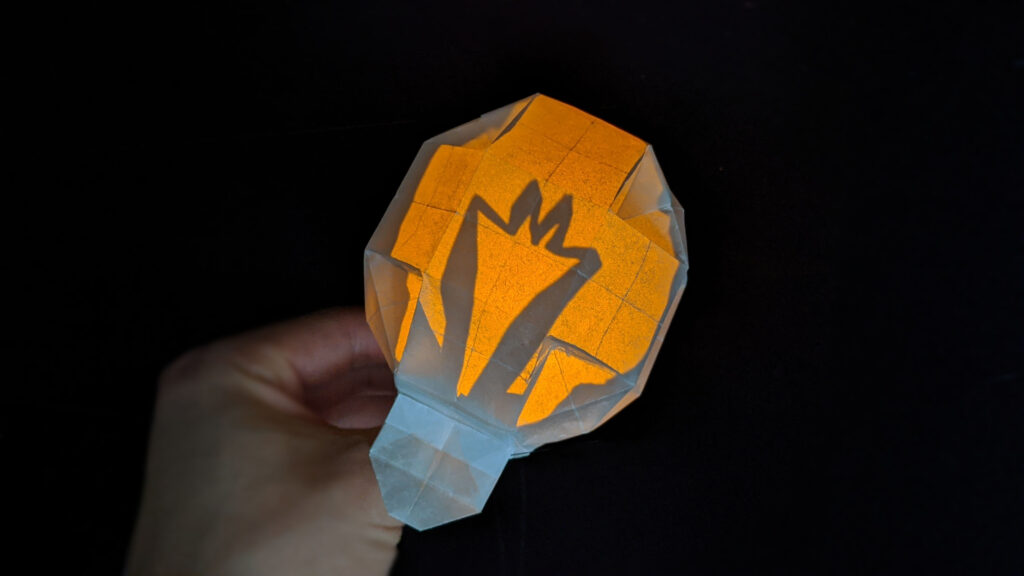
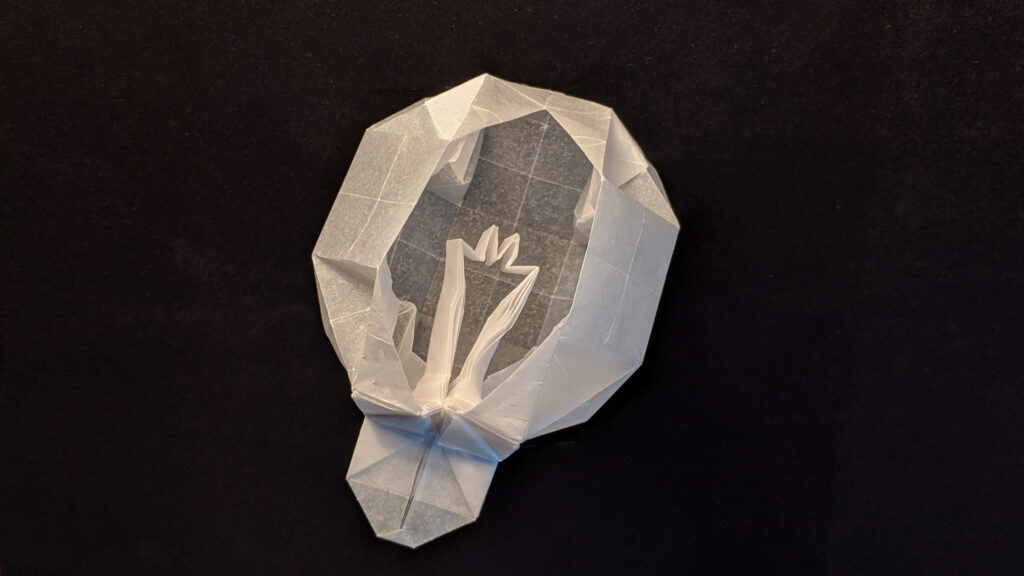
It’s nice to see the filament through the orange LED from the back.
I use cellophane tape to join the top of the filament. After that, I glued the long strips for the filament, folded it into tiers, and did some other fastening and folding.
The filament is more visible from the back side, so it looks more like a light bulb.
LIMITATION
I myself find three problems with this work: one is, obviously, the metal fitting part, the other is the finish on the back side, and the third is the gluing method. I personally feel that there are three problems with this piece. The problem with the hardware, the finish on the back side, and the gluing method.
Because the metal fittings are not expressed in a three-dimensional way, the lower half of the work does not have a strong presence, and the work as a whole is unbalanced. And, the back side doesn’t look quite good, so I’m not satisfied with it. Also, personally, I don’t like to use cellophane tape with origami, especially for making the gluing.
Maybe, I will remake it…
THANKS
Thank you for your reading. Please feel free to comment if you want to know more or find any mistakes!
Tomoaki. H.

Leave a Reply